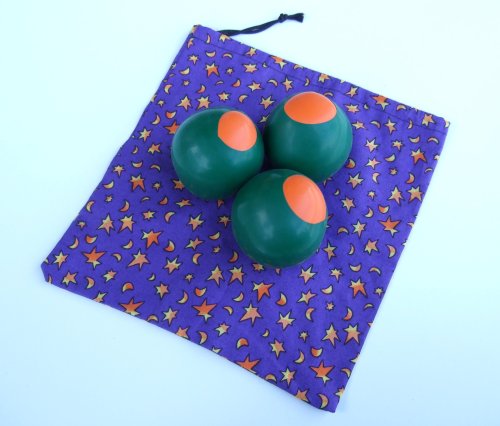
How To Make Your Own Squishy Juggling Balls

This is a tutorial on how to make your own squishy juggling balls. I've probably made over a hundred of these balls, and they work great!
All content on this page is licensed under a Creative Commons License
Tools, Materials and Supplies
Here's what you'll need in order to make a set of your own juggling balls:
- Scissors
- Funnel
- Tape
- Measuring Cup (1/2 Cup)
- Empty bottle
- Three 12 inch balloons per ball
- Your choice of filling: Sand, Rice, Birdseed (1/2 cup per ball)

Choosing a filling:
- Birdseed - This is the lightest, squishiest filling. When you pick out the birdseed, make sure that you get the kind without any large seeds - Otherwise, they will poke through the balloons. Usually (but not always), bird seed for finches will be your best bet.
- Rice - This filling is a little heavier than birdseed, but lighter than sand. It also feels really cool when you catch it.
- Sand - The heaviest of the three, sand will make a dense ball that works well in the wind and lands solidly in your hand.

How to Make the Balls
Start by putting the funnel into the empty bottle. Measure out 1/2 cup of filling, and pour it into the funnel. Once all of the filling is in the bottle, remove the funnel.

This is the trickiest part - Blow up one of the three balloons. Then, without letting all of the air out, attach the balloon to the bottle. This may take a bit of practice, but after a few tries it's really not that bad.

With the balloon attached to the bottle, turn it upside down and let all of the filling go into the balloon.

Pull the balloon off of the bottle and let all of the remaining air out.

Cut the top half of the baloon stem off.

Fold down the remaining balloon stem and tape it into place.

For the next two balloons, cut the entire stem off. You actually want to cut a little bit below the stem where it starts to flare out. Try to stretch the balloon out slightly and cut the stem off with one motion so that you get a clean cut.

With the folded stem facing up, stretch one of the remaining two balloons over the ball. In other words, the taped down stem should be going towards the back of the balloon you are stretching over it. Now, turn it over so that you can see the circle of color from the original balloon.

With the circle of color facing up, take the third and final balloon and stretch it over the ball. At this point, you might notice that your ball has an air bubble in it. Don't worry about it - in about a day all of the air will bleed out of the ball and it will look great.

Congrats, you've made a juggling ball! Once you've made two more, you'll have a set of three balls to juggle with!
If you have any questions or comments, please email me at jeremy@juggler.org