How To Make Your Own Juggling Clubs
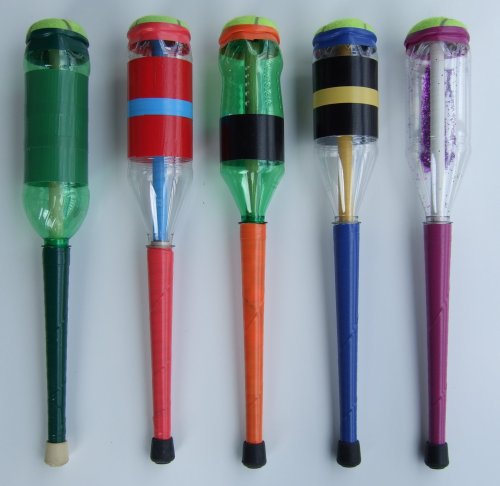
I recently discovered The Green Club Project - originally researched and written by Jonathan Poppele, it was turned into a PDF and put on the Internet by Greg Phillips in late 2006. After reading through the instructions, I decided to not only make a set of clubs for myself, but also to turn the PDF file into a web page, complete with step-by-step photos. Enjoy!
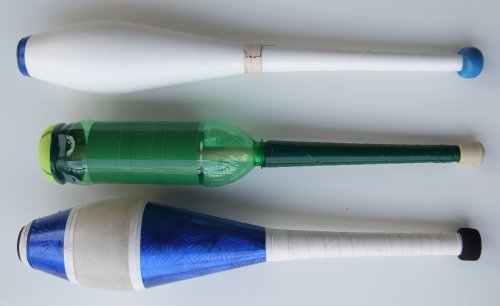
Here is my very first Green Club (in the middle), with a Play PX3 Pirouette on the top and a Renegade 105mm on the bottom for comparison.
Download the original Green Club Project build instructions (Zipped PDF format, 644 kB)
All content on this page is licensed under a Creative Commons License
Tools, Materials and Supplies
There are a number of things you will need to have on hand to make a set of your own clubs. Please read through the directions thoroughly and make sure you understand them before you rush out and buy anything, especially tools. I was able to find tons of empty pop bottles by checking the recycling bins at my apartment complex and office, and several friends were able to supply me with some old tennis balls. Note: Another source of old tennis balls could be a local tennis club.
Tools you'll need:
- A pencil and a pen
- Wood saw (Optional, see note on step 1)
- Tape measure (Optional, see note on step 1)
- Drill with a 3/32" bit and a Phillips driver bit
- Phillips screwdriver
- Small sharp knife or box cutter
- Good sharp scissors (But NOT your parent's or spouse's Really Nice Sewing Scissors. Trust me on this one.)
- A black permanent marker, such as a Sharpie
- Staple gun with 3/8" stapes (Optional, see note on step 7)
- Small hammer (Optional, see note on step 7)
Supplies you'll need:
- Sheet of lightweight card stock, at least 8.5" by 14"
- Masking tape
- Vinyl tape in a color of your choice
- Duct tape in a color of your choice
Materials you'll need:
- Hardwood dowel, 5/8" by 36"
- Clean 16 oz, 20 oz or 24 oz plastic beverage bottle with label removed
- Tennis ball
- Clean 2 liter beverage bottle with label removed
- Rubber furniture tip, 5/8"
- Drywall screw, #6, 1 1/4"
- Finishing washer, #10 or #8

Part I: Preparing the Parts
1. Prepare the Dowels
Mark each dowel 18 inches (45.7 cm) from one end.

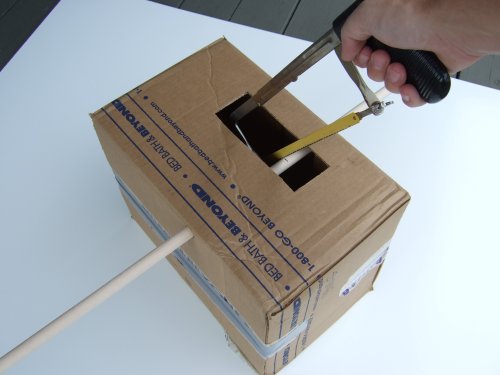
Using a saw, cut the dowel at the mark. The dowels I got were 36 inches long, so one cut produced two 18 inch dowels. Check out the nifty box worktable - it only took a few minutes to put together, and it kept my hands safely away from the saw blade while also catching the sawdust! Note: Many hardware stores will cut dowels to length free of charge at the time of purchase.
2. Drill the Parts
Put the 3/32" bit into your drill. Make sure it is at least as long as the screw.
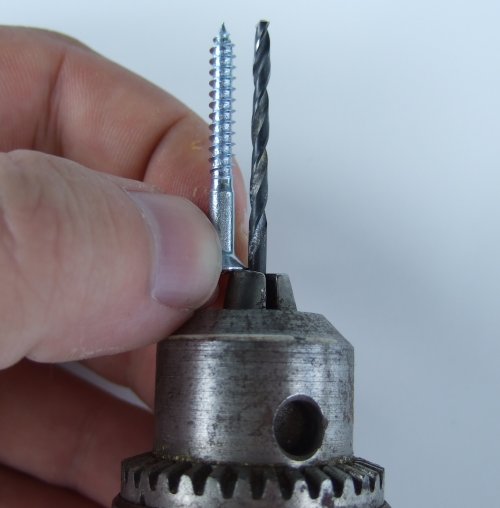
Drill a hole as deep as the screw in the center of the smoothest end of each dowel.
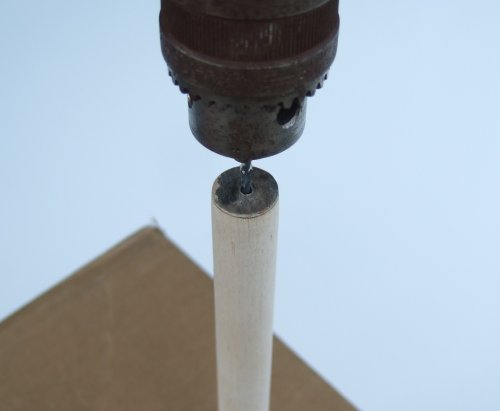
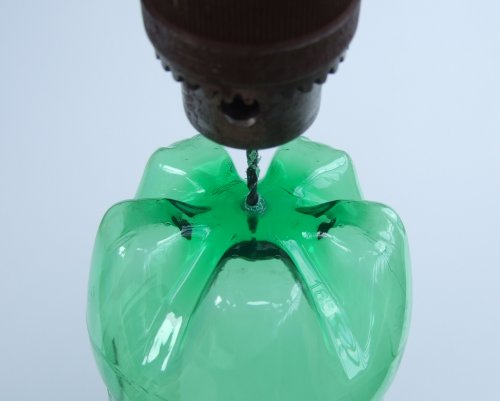
Drill a hole through the exact center of the bottom of each 16 oz, 20 oz, or 24 oz pop bottle. As long as you've got your hands on the bottle, now is a good time to remove the label and the little plastic ring around the neck.
3. Make the Tennis Ball End Caps
Measure a strip of light card stock or stiff paper 1 1/4 inches wide and at least 8 inches long. Wrap the strip around a tennis ball tightly and secure it with tape. The strip will now form a ring 2 1/2 inches in diameter and 1 1/4 inches tall.
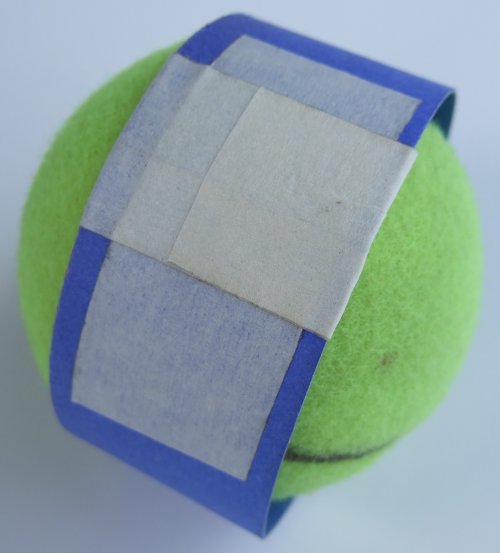
Place the ring on a smooth, firm surface and place a tennis ball down into it. The ring will come exactly halfway up the ball.
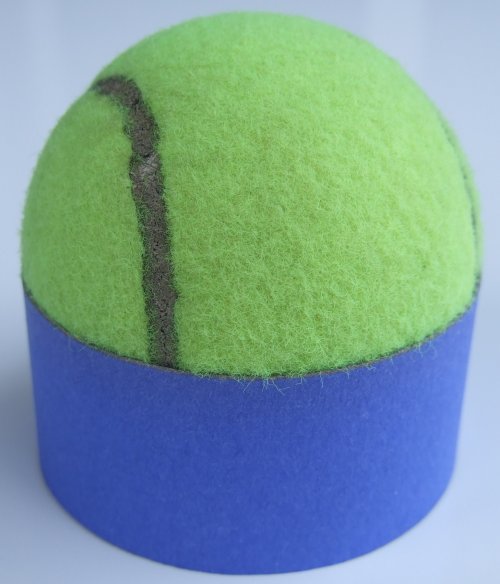
Trace the top of the ring all the way around the ball. I found it to be easier to hold the marker steady in one hand while I slowly spun the ball with my other hand. Here is what the ball will look like after you remove the ring:
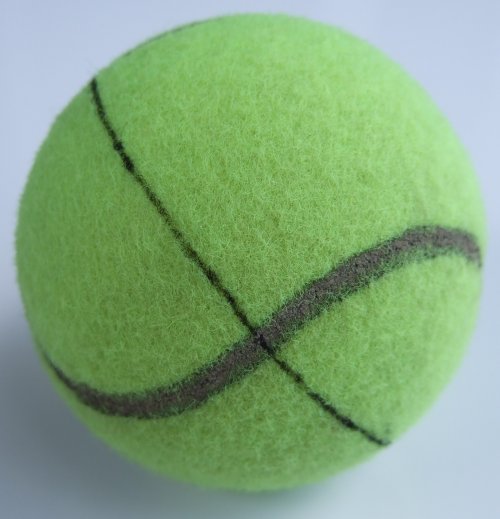
Using a box cutter or small, sharp knife, make an incision along the equator that you just drew. Cut all the way around the ball along the equator. Note: Tennis balls are hard to cut. Go slowly, be careful and always cut away from yourself. Note that in the picture I am cutting towards the ground, away from my hand.
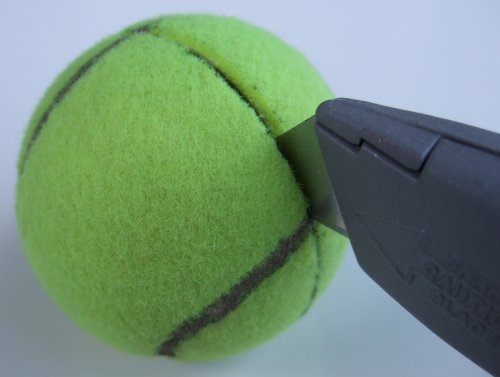
4. Make the Handle Wrap
Print out the handle wrap pattern. I ended up printing on the back of some 'letter' sized old papers, so I had to assemble the pattern after I printed it out. I didn't have any problems reusing a single pattern on over 50 two liter bottles, but if you want a beefier (i.e. more kid-proof) template, you may want to print out the pattern on some kind of card stock. Don't forget to print out the pattern at 100% size and check the guide against a measuring tape - I did it wrong the first time and had to print out the pattern a second time.
Wrap the pattern snugly around a 2 liter bottle. The tab will overlap the other side of the pattern - that is where you tape it down. Trace the pattern using a permanent marker.
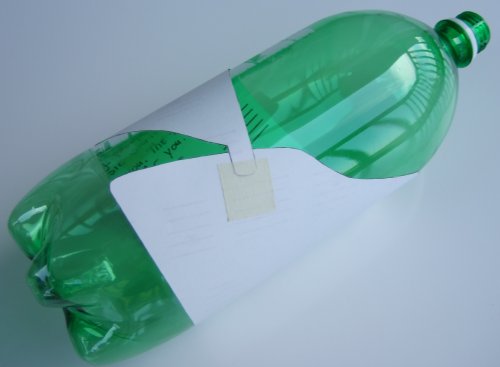
Remove the pattern. Your bottle should now look something like this:
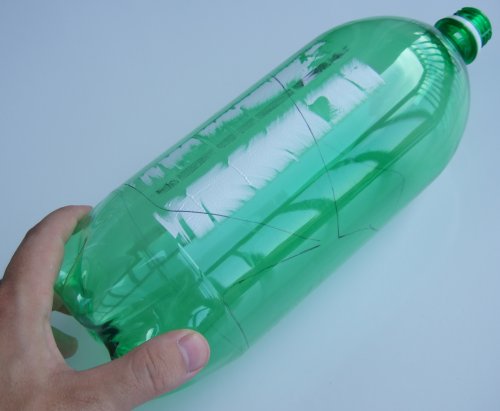
Make an incision in the bottle with a box cutter or knife.
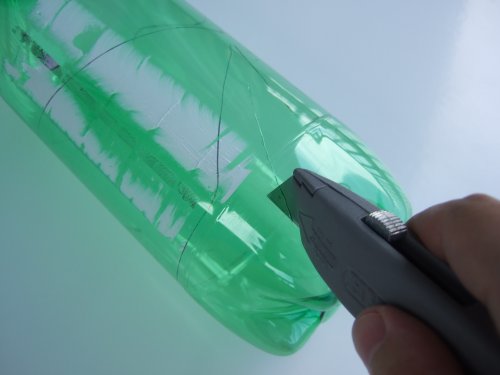
Once the incision is made, you should be able to start cutting out the pattern with a pair of scissors. Try to cut cleanly to prevent nicks and burrs. I started by cutting around the base until the bottom fell off:
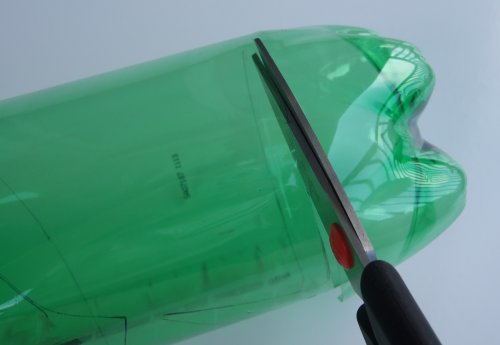
Then, I cut along one of the edges of the pattern up the length of the bottle:
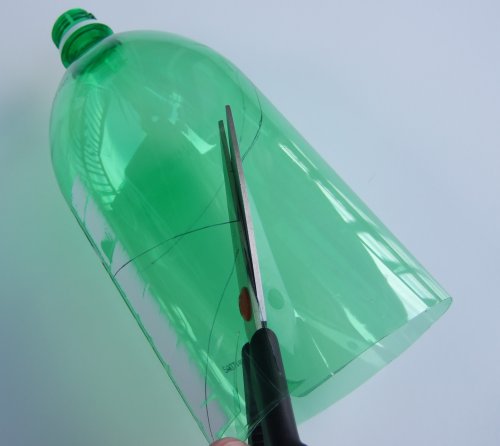
After that, I cut around the top of the pattern until the top fell off:
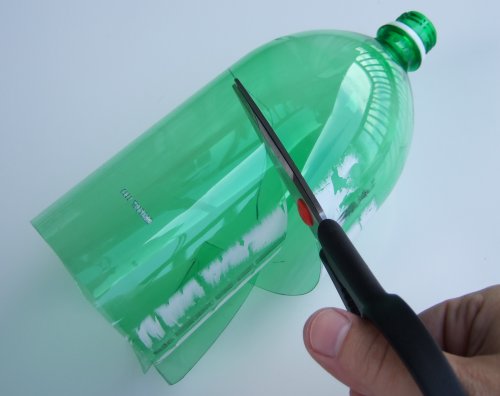
After trimming off any excess bits I had left, this is what the handle wrap looked like:
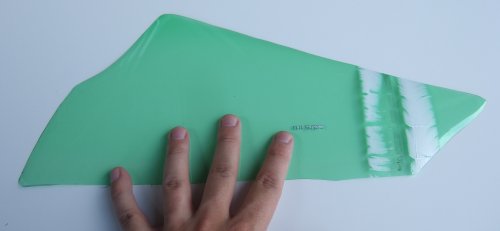
Congratulations! You are done with Part 1. You now have all of the parts you need to assemble your clubs.
Part II: Assembing the Club
5. Fit the Dowel to the Bottle
Place one of your 16 oz, 20 oz, or 24 oz bottles over the dowel so that the screw hole in the dowel lines up with the screw hole in the bottle. Mark the dowel just below the bottle.
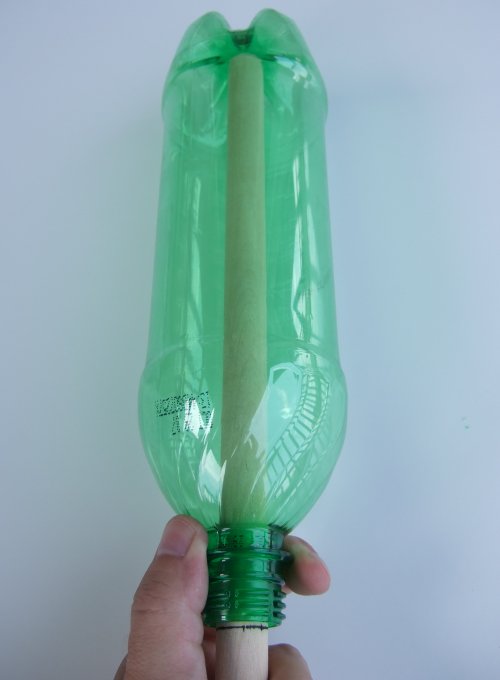
Note: This will be your last chance to decorate the inside of the bottle or the part of the dowel that will be inside the bottle. You will be able to see the dowel through the bottle, so make sure you are happy with how it looks! I have heard suggestions like sprinkling a bit of glitter inside the bottle, taping the dowel with some colorful tape, or even inserting LEDs (if you figure out how to do this, please let me know!).
Wrap the dowel with masking tape just above the mark you made until the bottle fits snugly on the dowel. It doesn't have to be super tight, just a little snug will do.
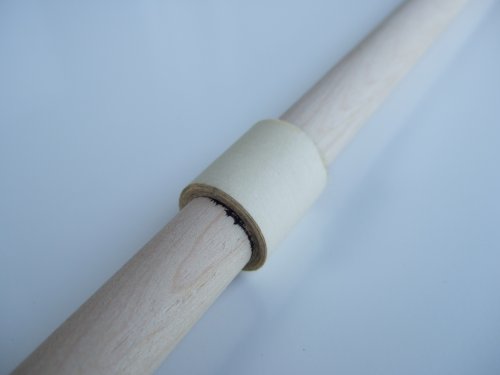
Fit the bottle on to the dowel with the screw holes lined up.
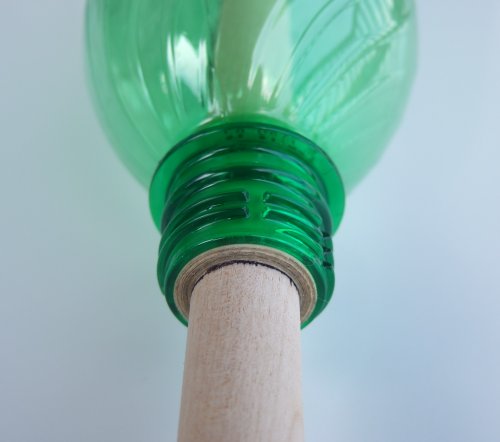
6. Attach the End Cap
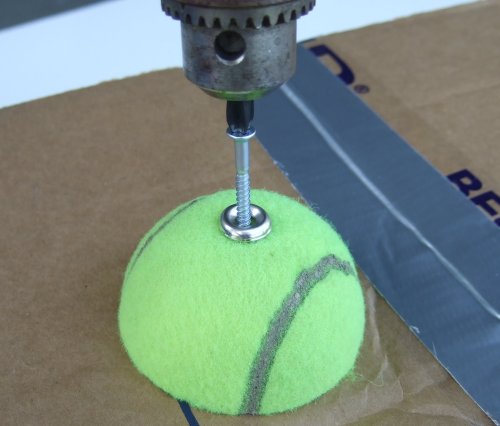
Place a finishing washer onto one of the screws. Attach a phillips bit to your drill. On a work surface, use the drill to drive the screw through the top center of one of your tennis ball halves.
Invert the tennis ball half over the screw head.
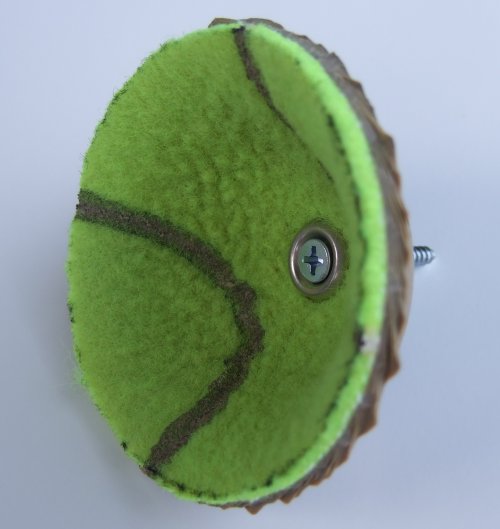
Place the screw into the hole on the bottom of the bottle. Make sure the screw holes in the bottle and dowel are lined up properly. Brace the bottom of the dowel against a hard, non-slip surface so the bottle bottom faces you. Holding the bottle by its neck with your bottom fingers around the dowel, drive the screw into the dowel. Some people use the drill for this, but I preferred to start the screw off with a screwdriver for the first few turns, then switch to the drill. It is important to go slowly - don't risk stripping the screw or the dowel. If you have a fancy new drill, a medium-high setting on the clutch should work well.
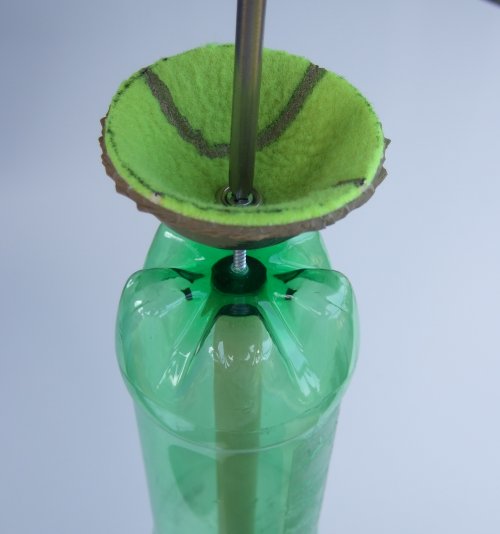
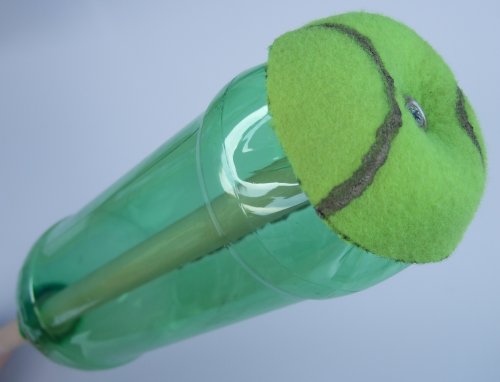
This is what it will look like when the screw has been fully tightened:
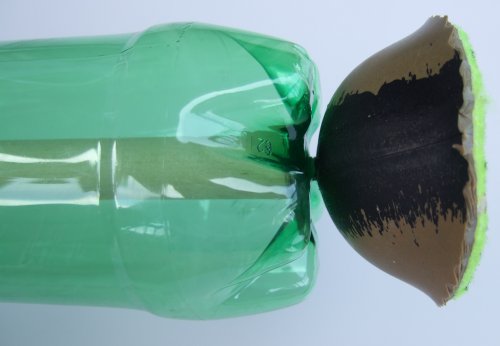
Turn the end cap right-side out. It will look crater shaped and flare out away from the bottle bottom (This is a really great feature, because it keeps the screw head from messing up the floor when you drop the club). Press the edge of the end cap down and in against each of the the five "feet" on the bottom of the bottle. This will dent the bottle and provide a good surface for the end cap to seat against.
7. Attach the Handle Wrap
Ok, now it's time to attach the handle wrap to the club. This may be the trickiest part of the whole process, but it is also the part that will make a big difference in how nicely the clubs turn out. The objective is to wrap the handle around the neck of the bottle and the dowel very tightly to provide a good spring handle. If you've never juggled clubs with a spring handle before, this all might seem a bit complicated and silly, but trust me on this, it's worth it.
Start by lining up the middle of the top curve of the handle wrap with the collar at the base of the threading on the neck of the bottle. Place the club on the edge of a firm surface with the collar just off the edge. Using a staple gun with 3/8 inch staples, secure the handle wrap to the collar. You may need to use a small hammer to finish seating the staple firmly into the dowel. The first time I did this, it took a few tries - I had to aim the staple between the threads on the collar. Note how the top of the handle wrap is flush against the collar.
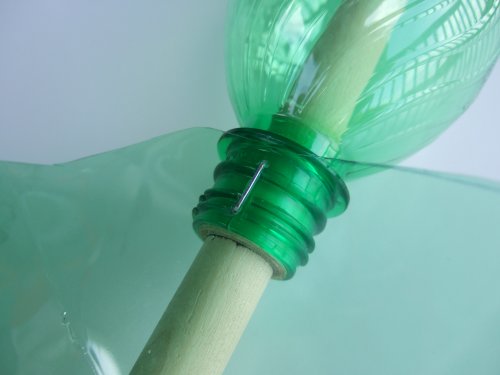
Once you have the staple in, this is what the handle wrap should look like:
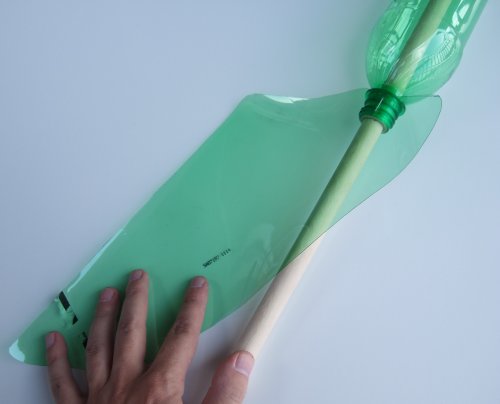
Wrap the handle wrap around the dowel, getting it as tight as possible. The end of the wrap should line up with the end of the dowel, but if you're short by a tiny bit, don't worry because the knob will cover it up.

Secure the bottom of the handle wrap with a staple or with vinyl tape. If you use tape like I did, be a bit liberal with it and wrap it tightly. Make sure the handle wrap is as tight as you can get it. If it loosens up as you are securing it, re-wrap it and secure it again.
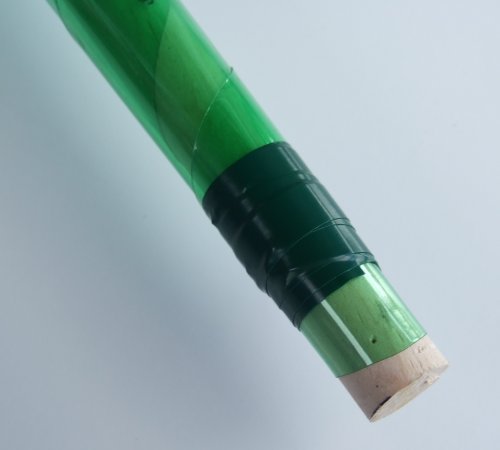
- Remember: Make sure that the top curve of the handle wrap is secure and flush against the collar on the neck of the bottle, the bottom edge of the wrap is even with the bottom of the dowel, and that the handle is wrapped as tight as you can get it.
- It is possible to secure the handle wrap using only tape. This is a bit trickier, but may be necessary if you do not have easy access to a staple gun.
- You can secure the top with a small nail or screw. If you do this make sure the fastener has a broad head so it doesn't pull through the handle wrap and drill a pilot hole so you don't crack the bottle neck or the dowel.
- You may prefer to use 1/2 inch staples for the top to secure farther into the dowel, or 1/4 inch staples for the bottom.
You're almost there! All that is left is the finishing work.
Part III: Finishing the Club
8. Tape the Handle
Wrap the handle with a vinyl tape in the color of your choosing. Start at the end of the club and work towards the center. Give the end an extra wrap before you begin to help keep the handle wrap secure. Wrap in a spiral, overlapping the tape slightly (1/16 inch is plenty, but you can go up to half the width of the tape if you want). Keep the tape stretched slightly as you go to get a smooth wrap. Finish with an extra wrap or two just below the collar (this will help cover the staple so it doesn't poke you).
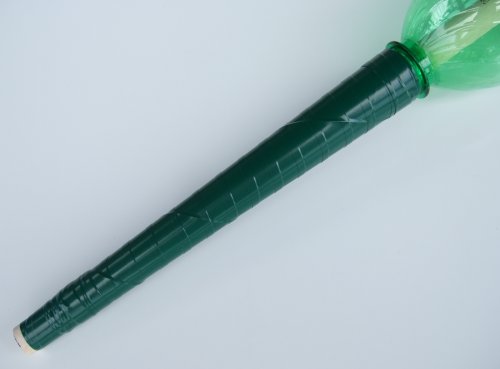
9. Add the Knob
Fit the rubber furniture tip onto the end of the club as a knob. It will be a very tight fit and does not need to be secured.
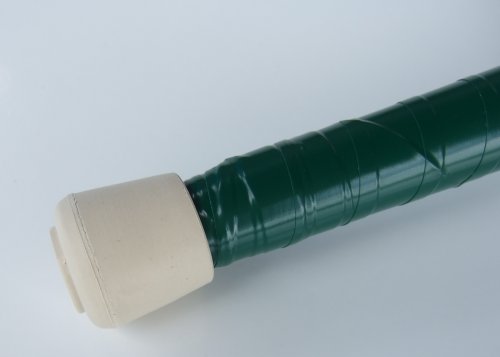
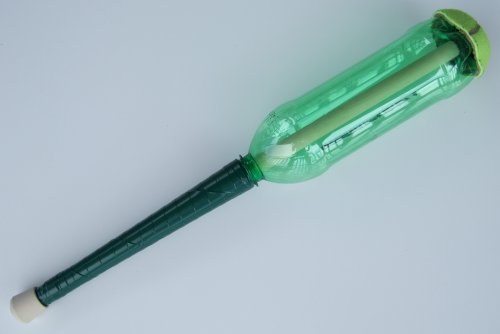
Here is what the club now looks like:
10. Additional Taping
You may wish to add a single wrap of contrasting vinyl tape at the top of the handle just below the collar. This is purely for aesthetic purposes. I decided to skip this step for this particular set of clubs.
Put a wrap of vinyl tape around the junction between the bottle and the end cap.
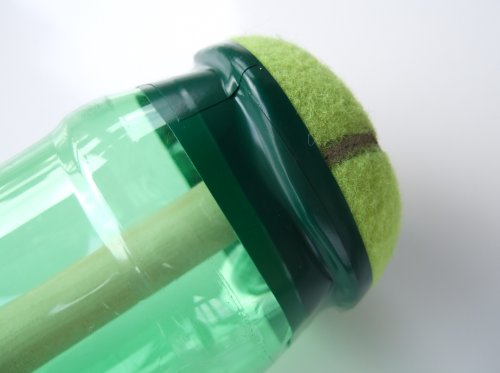
Wrap the smooth, cylindrical center portion of the bottle with duct tape. This will give the bottle some structural support, balances the club, and provides a surface you can attach decorations to.
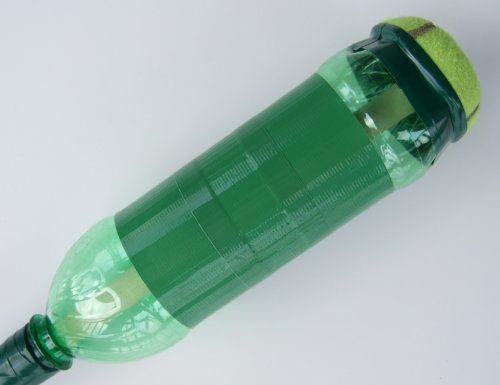
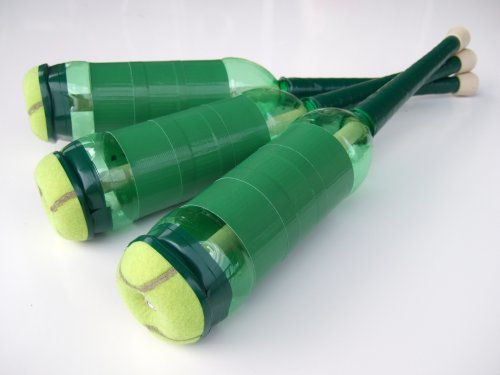
That's it! You just made your very own juggling club!
Part IV: Get Creative!
Now's the time to bust out your secret stash of sparkle motion rainbow stickers. Decorate that club!
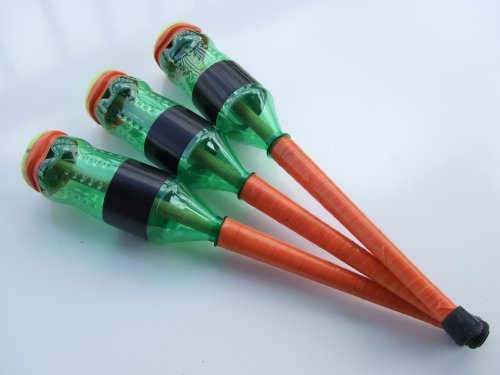
Here is a set of three clubs I made with 20 oz Sprite bottles:
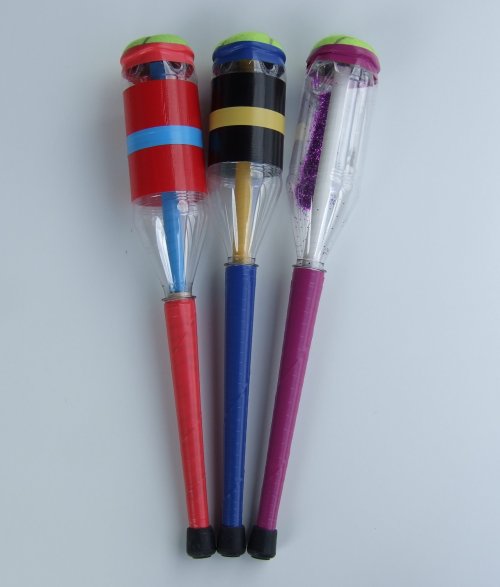
Here's a couple of clubs I made at the 2007 Maker Faire. I used a 24 oz Dr Pepper bottle for the red club on the left, and 20 oz Dr Pepper bottles for the other two. You can definitely see the tradeoff in handle length vs body size with the different bottles. Check out how I wrapped the dowels with tape before I inserted them into the bottles. And yes, that is purple glitter inside of the club on the right - It works ok, but when you're juggling it, all of the glitter winds up at the end of the club and doesn't bounce around and look awesome like I thought it would. Hmm, better start working on the plans for Glitter Club 2.0!
If you have any questions or comments, please email me at jeremy@juggler.org